


WordPress Vue CLI (step 1 ) – Install CLI, create new project, fatch posts from wordpress api
Install CLI :
First of all navigate with terminal under your project folder and install the new CLI:
npm install -g @vue/cli
This command install the CLI on our project folder.
When installation finish we can test if all it’s right by call the
vue
Command in terminal.
This command basically list all the available commands.
Now we can check witch versions of CLI we had installed :
vue --versions
Create new Project :
Now let’s create our new project:
We can create or generate a new Vue app by running the following command in terminal:
vue create vue-project-name
Now terminal will prompt you for the preset you want to use for your project:
The default preset which installs two plugins: Babel for transpiling modern JavaScript, and ESLint for ensuring code quality.
Or manually select the features needed ( i choose preset ).
if all it’s right you have a terminal message like :
🎉  Successfully created project vue-project-name.
👉  Get started with the following commands:

$ cd vue-project-name
$ npm run serve
Navigate inside your project’s folder:
$ cd vue-project-name
add some features ( if you want you can add them later )
vue add router (I'll select not to use history mode) vue add vuex vue add bootstrap-vue vue add @vue/pwa npm install --save axios
and run the following command to serve your project locally:
npm run serve
The command will allow you to run a local development server.
Now navigate to http://localhost:8080/, and if all it’s right, you see a screen like this one:
Now go to create our first component:
Create a file called PostTemplate.vue in the components folder – this will contain the template snippet for the post, and add this code:
<template>
<div>
<h1 v-html="post.title.rendered"</h1>
<div v-html="post.excerpt.rendered"></div>
<img v-if="post.fimg_url" class="img-fluid" :src="post.fimg_url">
<img v-else class="img-fluid" src="https://picsum.photos/350/363">
</div>
</template>
<script>
export default {
name: 'PostTemplate', props: ['post']
}
</script>
<style scoped="">
h1 { margin: 40px 0 0; }
</style>
In home.vue replace references to HelloWorld with PostTemplate:
<template>
<div class="home">
<img alt="Vue logo" src="../assets/logo.png">
<PostTemplate v-for="post in posts" v-bind:key="post.id" v-bind:post="post"/>
</div>
</template>
<script> // @ is an alias to /src
import axios from 'axios'
import PostTemplate from '@/components/PostTemplate.vue'
export default {
name: 'home',
data(){
return { posts: [] }
},
components: { PostTemplate } }
</script>
Fetch posts from wordpress :
At this point we go to fetch a basic list of posts from wordpress.
You must have an active installation of wordpress with some posts.
If all it’s right by visiting “http://your-wp-installation.com/wp-json/wp/v2/posts/”, can see the full lists of posts bringing from your wp installation.
Now let’s change the Home.vue in this way.
<img alt="Vue logo" src="../assets/logo.png"/> <PostTemplate v-for="post in posts" v-bind:key="post.id" v-bind:post="post"/> </div> </template>
 <script>
// @ is an alias to /src
import axios from 'axios'
import PostTemplate from '@/components/PostTemplate.vue' export default {
name: 'home',
data(){
return { posts: [] }
},
components: { PostTemplate }, mounted(){ axios.get('http://your-wp-installation.com/wp-json/wp/v2/posts/') .then((r) ={{ ; this.posts = r.data); } } </script>
If all it’s right the page will reload and than you see something like the image below:
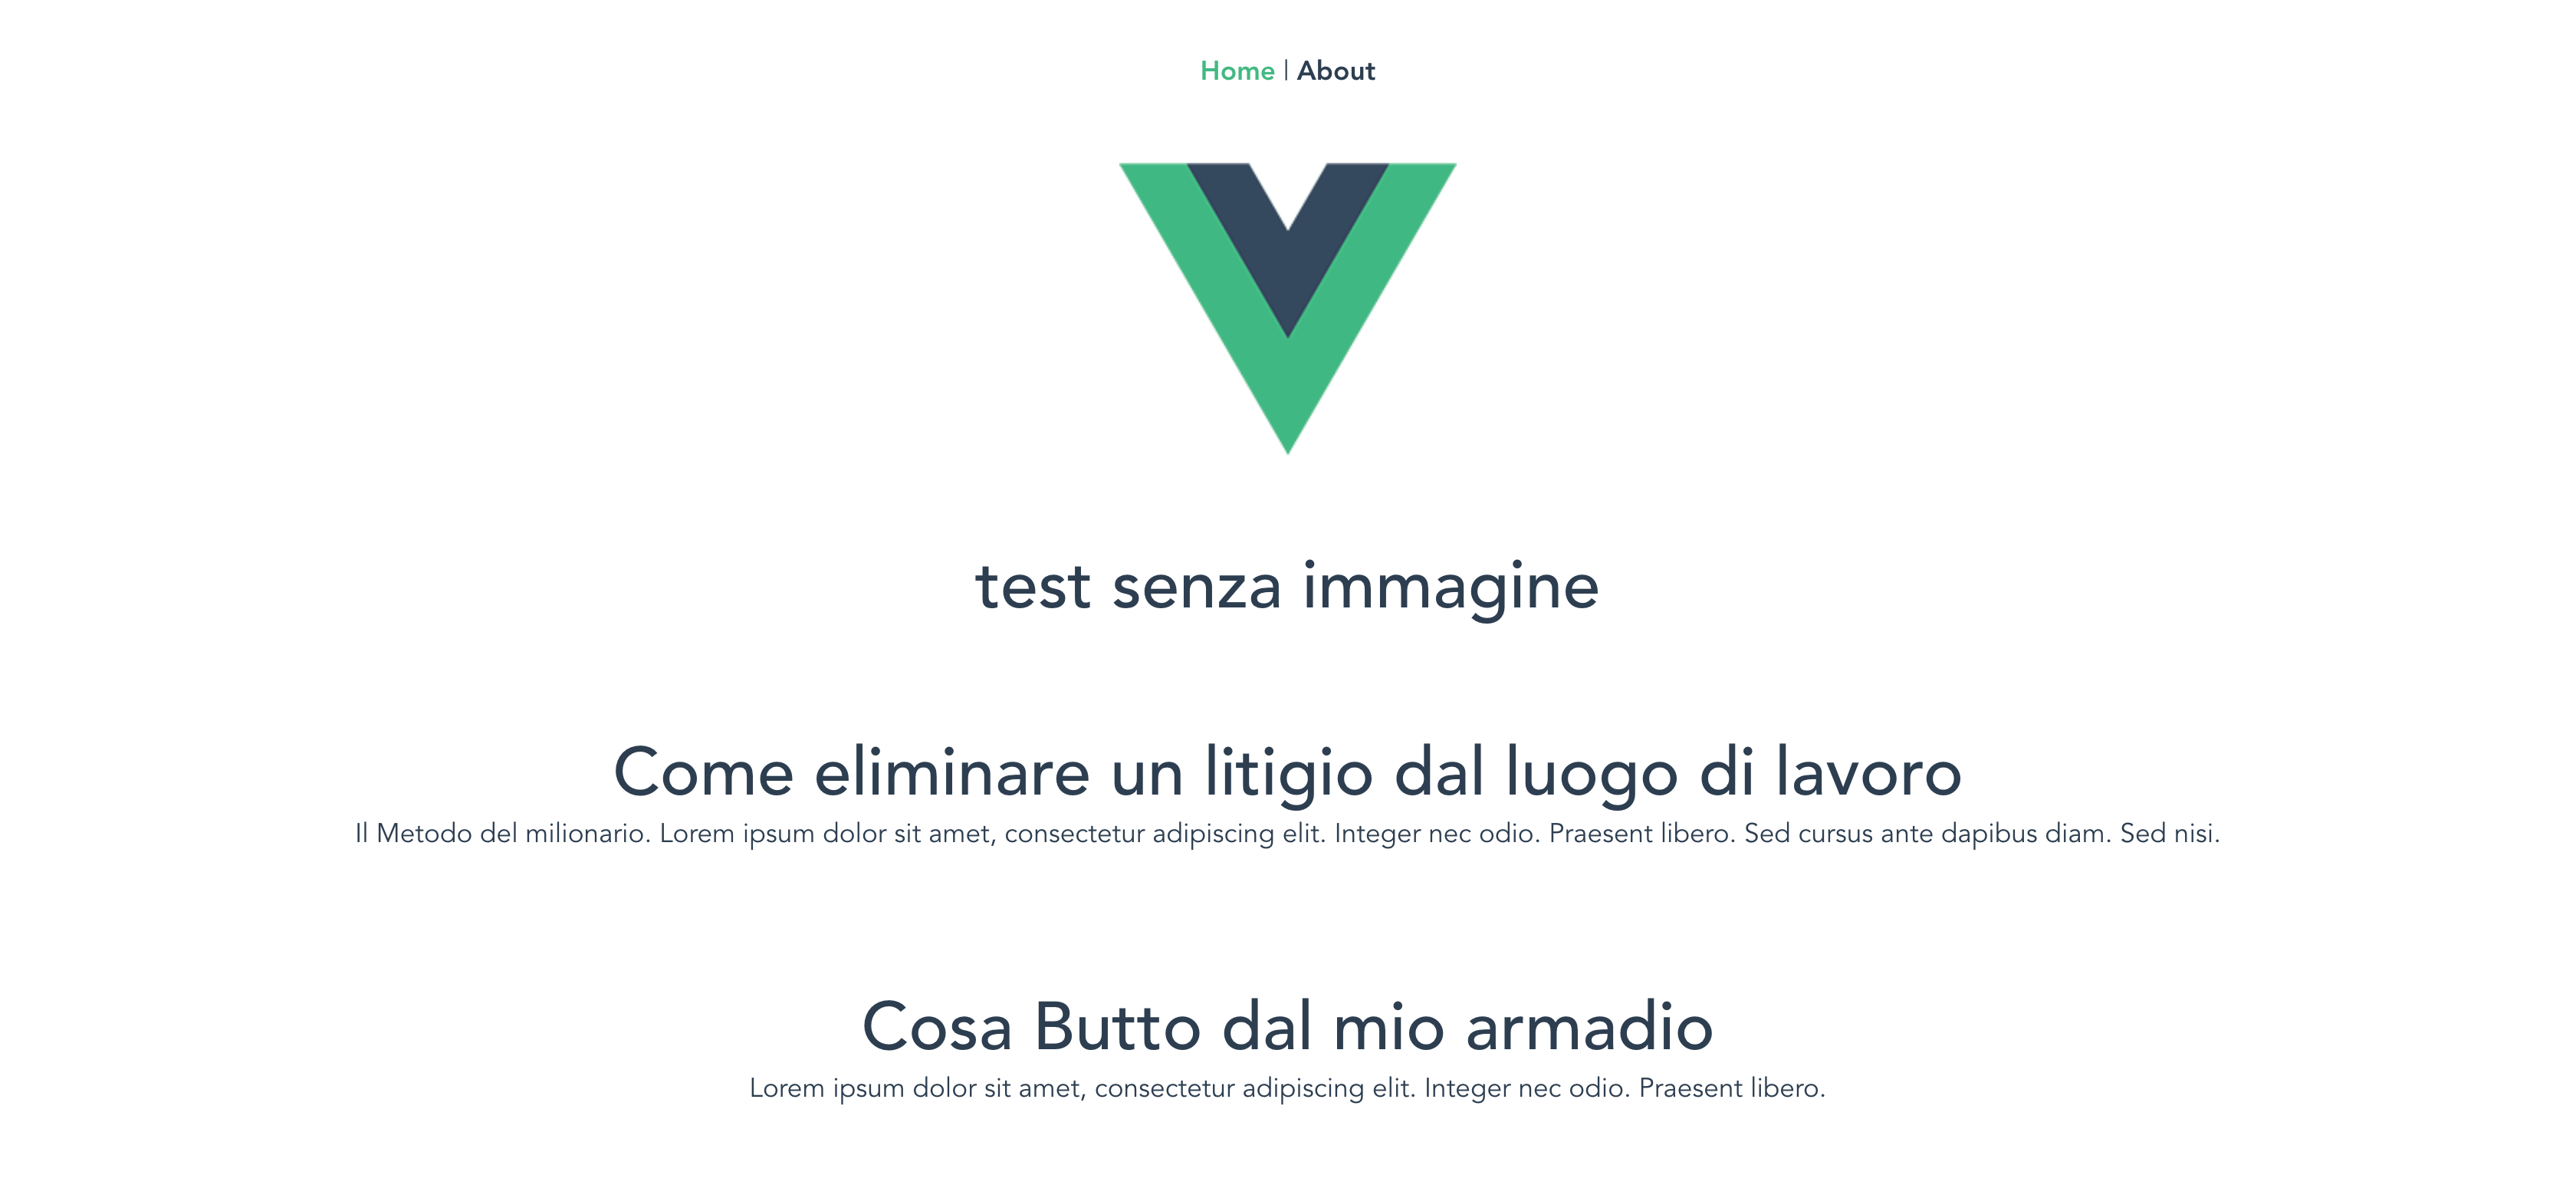
.
All your posts are fetch from wp and displayed in a Vue App.